


Views: 0 Author: Site Editor Publish Time: 2026-09-23 Origin: Site


Auto body repair demands an uncompromising level of precision, immense patience, and a highly trained eye for microscopic detail. Picture a scenario that plays out in collision shops every day: you have just spent hours meticulously blocking a welded quarter panel with a longboard. Bare-handed, the surface feels like glass. However, the exact second you dust on a dark dry guide coat and make a pass with a 180-grit abrasive, a frustrating lunar landscape of tiny craters and trenches suddenly emerges. It is a harsh reality of the trade. Even the most minor, overlooked defects can easily ruin an otherwise flawless, mirror-like clear coat.
Micro-imperfections—ranging from solvent pop pinholes and aggressive DA sander pigtails to isolated rock chips—actively disrupt the surface tension of your topcoat. Many novice painters operate under the false assumption that a high-build primer surfacer will simply bury these flaws. Unfortunately, primer shrinks as its solvents evaporate, eventually mapping out every hidden scratch weeks after the car leaves the booth. This is precisely where specialized finishing compounds become a non-negotiable asset. Operating as the ultimate problem-solver on the shop floor, this material bridges the critical gap between rough structural bodywork and the final refinement phase.
In this technical breakdown, we will examine exactly when to deploy these compounds, dissect the chemical differences between lightweight putties and traditional heavy fillers, and outline shop-proven techniques guaranteed to yield a zero-defect finish.
Specialized finishing compounds are engineered exclusively for micro-surface imperfections, lacking the tensile strength for deep dent repair.
They serve as the definitive final step in bodywork, sealing microscopic voids and preventing primer shrinkage.
Understanding the distinct viscosity and chemical differences between standard body filler and finishing putty prevents future cracking, sinking, and mapping.
Meticulous surface preparation combined with an ultra-thin "tight skim" application technique is the foundation of a flawless, invisible repair.
Integrating a premium 1K or 2K glazing putty into your workflow drastically reduces labor time and ensures superior paint adhesion.
Automotive finishing putty is a highly refined, low-viscosity refinishing compound deployed in the final stages of panel restoration. Formulated to be exceptionally smooth and naturally self-leveling, this material is chemically designed to flow into the micro-imperfections that standard, heavier body fillers inevitably leave behind. Unlike dense structural fillers packed with coarse talc or fiberglass strands, finishing putty features a fluid, buttery consistency. This unique rheology allows a technician to glide a whisper-thin layer over the repair zone. Once the cross-linking process completes, it sands effortlessly to an absolute featheredge, creating an undetectable transition into the surrounding OEM panel.
Within the professional collision repair sector, technicians primarily rely on two chemical variations: 2K (two-part) polyester glazing putty and 1K (one-part) acrylic putty. A 2K system requires a benzoyl peroxide cream hardener to initiate an exothermic chemical reaction. This makes it highly durable, solvent-resistant, and immune to shrinking. Conversely, a high-quality 1K finishing putty is dispensed ready-to-use straight from the tube. Because it cures entirely via solvent evaporation into the atmosphere, it remains incredibly convenient for rapid, localized cosmetic corrections where mixing a 2K batch would waste time.
From a substrate compatibility perspective, these premium compounds bond tenaciously to properly scuffed bare steel, aluminum, and galvanized panels. Furthermore, they adhere beautifully to sanded fiberglass and fully cured two-part epoxy primers. It is crucial to remember, however, that they will catastrophically fail if applied over glossy, unsanded clear coats or flexible TPO plastics without an adhesion promoter. Establishing a proper mechanical profile—often referred to as a "tooth"—is an absolute prerequisite for long-term viability.
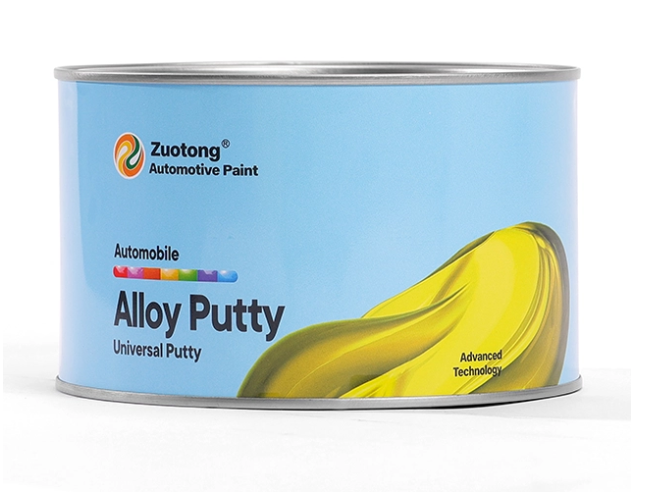
A persistent point of confusion for apprentices and DIY enthusiasts is distinguishing between standard body filler (often colloquially called Bondo) and finishing putty. While both are utilized to restore automotive panels to their factory contours, their chemical architecture, physical viscosities, and specific shop-floor use cases are entirely distinct. Selecting the incorrect compound for a specific defect is a leading cause of expensive paint failures and customer comebacks.
Standard body filler is inherently thick and highly viscous. Because it relies heavily on coarse talc particles to build volume rapidly, it is strictly utilized for shaping and leveling extensive areas of collision damage. It boasts the structural density required to fill deep dents. Nevertheless, this coarse formulation has a severe drawback: as it cures and is aggressively leveled with 40-grit or 80-grit abrasives, it traps air pockets and leaves behind deep, jagged sand scratches.
In stark contrast, a premium car paint putty is manufactured with micro-refined resins and ultra-fine powders. It intentionally lacks the structural integrity to fill deep voids. Instead, it is engineered to be applied in highly controlled, thin skim coats—rarely exceeding 1/8 of an inch in depth. Its reduced density allows the material to penetrate deep into tiny crevices, sealing them permanently.
To assist in making the correct technical decision for your bay, refer to the comparison matrix below:
Technical Feature | Standard Structural Body Filler | Automotive Finishing Putty |
|---|---|---|
Viscosity & Texture | Thick, heavy, paste-like | Thin, creamy, fluid, self-leveling |
Primary Application | Filling deep collision dents, shaping panels | Filling micro-defects, scratches, pinholes |
Maximum Safe Depth | Up to 1/4 inch per application layer | 1/8 inch or less (tight skim coat only) |
Abrasive Compatibility | Requires coarse leveling grits (40 to 80) | Sands effortlessly with fine grits (180 to 320) |
Pinhole Risk Profile | High (due to thick mixing and air entrapment) | Extremely low (displaces trapped air) |
Looking at the broader automotive refinishing landscape, there is a distinct, aggressive shift toward workflow efficiency and environmental compliance. Modern high-production body shops are rapidly abandoning outdated, porous fillers that require massive amounts of shaping and blocking. The current trend heavily favors ultra-refined, high-solid glazing putties that cure rapidly without the risk of solvent pop. Additionally, the rising adoption of UV-cured spot repair materials highlights a growing demand for instantaneous curing times. This technology allows a technician to move from applying putty to spraying primer in minutes rather than hours. Despite these high-tech advancements, traditional catalyzed polyester putties remain the absolute backbone of everyday collision work due to their unmatched cost-to-performance ratio, predictable sanding behavior, and bulletproof mechanical adhesion.
Understanding the specific, real-world scenarios where this compound excels is essential for maximizing shop throughput. It is a precision instrument; its application should be strictly limited to the final perfection stage before the vehicle hits the paint booth.
Eliminating Pinholes in Body Filler: Pinholes are undeniably the enemy of a high-gloss finish. They typically occur when air is folded into body filler during the mixing phase on the board. When you block the filler flat, you slice the tops off these trapped bubbles, exposing tiny voids. Because a standard primer surfacer is too thin to permanently bridge these gaps without eventually sinking, a specialized compound serves as the ultimate pinhole filler. By applying a tight skim coat with firm pressure on the spreader, you break the surface tension, forcing the creamy resin deep into the pores.
Eradicating Sanding Marks: During heavy structural bodywork, aggressive sanding is mandatory to knock down high spots quickly. Unfortunately, 80-grit abrasives leave deep trenches in both the filler and the surrounding bare metal. If you attempt to spray primer directly over these gouges, the primer will initially bridge the gap. However, as it shrinks over the following weeks, the scratch will reappear—a defect known as "sand scratch swelling." Consequently, skimming the area with a dedicated scratch repair putty fills these microscopic valleys, guaranteeing the primer has a perfectly flat foundation.
Correcting Isolated Surface Defects: Not all bodywork requires welding or grinding down to bare metal. Everyday driving frequently results in isolated rock chips on the hood or minor hail dings on the roof that barely penetrate the clear coat. For these micro-imperfections, mixing heavy filler is excessive and incredibly difficult to featheredge cleanly. A 1K compound is the ideal spot repair putty for these exact situations. Its ultra-fine texture allows it to be pressed directly into a scuffed chip, leveling the defect flush without creating a massive, unnecessary repair footprint.
Achieving a mirror-like finish requires strict adherence to standard operating procedures. Bypassing steps to save time will inevitably cost you more time in the polishing phase. Follow this workflow to ensure optimal mechanical adhesion.
Step 1: Meticulous Surface Decontamination
Surface preparation dictates the ultimate success or catastrophic failure of any chemical repair. Begin by thoroughly saturating the area with a high-quality wax and grease remover to eliminate silicone, road tar, and technician body oils. Once purified, the surface must be scuffed. If applying over cured body filler, ensure it is leveled with 180-grit sandpaper. For spot repairs over an existing factory clear coat, scuff the localized area with a red Scotch-Brite pad or 320-grit paper until it is entirely dull.
Step 2: Mixing and Managing Hardener Ratios
If utilizing a 1K product, preparation is minimal—simply knead the tube to distribute the solvents before dispensing. However, 2K glazing putties demand precise chemistry. Dispense a golf-ball-sized amount of putty onto a non-porous mixing board. Add a thin strip of cream hardener across the diameter (targeting a 2% ratio by weight). Mix by continuously folding the product onto itself with a clean metal or plastic spreader, pressing firmly to squeeze out trapped air. Avoid over-catalyzing (adding too much hardener). Excessive peroxide makes the cured putty brittle and triggers "bleaching"—a visible yellow stain that bleeds directly through light-colored basecoats.
Step 3: Executing the "Tight Skim" Technique
The physical application method is critical to minimizing sanding time. Pick up a small bead of the catalyzed mixture with your spreader. Hold the tool at a steep 45-degree angle to the panel. Apply firm, consistent pressure as you pull the blade across the repair zone. Your goal is a "tight skim." You are not attempting to build structural thickness; instead, you are hydraulically forcing the material deep into the pinholes while simultaneously wiping away the excess. The resulting layer should be whisper-thin and nearly translucent at the outer edges.
Step 4: Guide Coats and Precision Blocking
Allow the putty to cross-link completely based on the manufacturer's specified flash times (usually 20 to 30 minutes at 70°F). Before reaching for sandpaper, lightly mist a dry powder guide coat over the repair. This contrasting layer instantly highlights deep scratches and low spots. Begin blocking with 180-grit sandpaper attached to a firm, flat block. Never use bare fingers, as they will dig uneven trenches into the soft material. Sand in an "X" cross-hatch pattern to maintain panel flatness. As the guide coat disappears, switch to 320-grit paper to refine the surface and establish an invisible featheredge.
Selecting the precise product for your specific repair scenario optimizes your workflow and heavily influences the longevity of the paint job. When evaluating options, viscosity and sanding characteristics matter significantly. Look for products that advertise self-leveling properties and non-clogging formulas.
For instance, utilizing a product like the ZF9308 Mud Yellow Filler Putty offers distinct advantages on the shop floor. The specific mud yellow color provides excellent visual contrast against standard gray primers and bare metal, making it incredibly easy to spot high and low areas during the blocking phase. Furthermore, high-grade formulations like this utilize micro-refined talc, meaning the putty sands to a powder in under 20 minutes without gumming up your expensive abrasive discs.
The choice between 1K and 2K products should be dictated entirely by the scope of the damage. If you are dealing with a single rock chip on a bumper, a 1K product is highly recommended for its speed. However, if you are skim-coating an entire welded quarter panel to eliminate widespread pinholes, a 2K automotive filler putty is vastly superior due to its catalyzed stability over large surface areas.
Automotive finishing putty is undeniably the definitive secret weapon for achieving a flawless, distortion-free paint job. By acting as the perfect, seamless bridge between rough structural bodywork and the final primer sealer stage, it systematically eliminates the micro-imperfections that would otherwise compromise the aesthetic value of the vehicle.
Whether you are restoring a classic muscle car from bare metal or executing a rapid spot repair on a daily driver, exercising patience during the putty application and blocking phases pays off exponentially when the final clear coat is sprayed. A meticulously prepared, pinhole-free surface guarantees that the paint will lay flat, reflect light evenly, and adhere permanently for years to come.
By understanding the intricate chemical differences between compounds, mastering the tight skim application technique, and utilizing professional-grade materials, you elevate your autobody skills from amateur to engineer-level precision. Ready to eliminate pinholes and mapping for good? Equip your shop with the right chemistry. Explore the full range of high-performance refinishing products at Zuotong Paint to find the exact formulation your next critical project demands.
Yes, most premium finishing putties are chemically engineered to bond directly to properly sanded bare metal, galvanized steel, and aluminum. The critical factor is ensuring the metal is thoroughly degreased and scuffed (typically with 80 to 180 grit sandpaper) to provide a mechanical tooth for the resin to grip. Always verify bare metal compatibility on the product's technical data sheet (TDS) before application.
Typically, a 1K putty will take 15 to 30 minutes to dry completely, depending heavily on ambient temperature, shop humidity, and application thickness. Because it cures via solvent evaporation rather than a chemical catalyst, applying it in whisper-thin layers ensures rapid flash-off times, allowing you to move to the primer stage much faster.
Absolutely not. Putty is strictly a surface leveling compound, not a sealer. It is highly porous and will absorb atmospheric moisture and paint solvents like a sponge if left bare. You must always apply a high-quality 2K primer surfacer or epoxy sealer over the sanded putty to lock it down, creating a uniform, non-porous substrate before spraying your basecoat.
Shrinkage and cracking occur almost exclusively due to technician error—specifically, exceeding the product's maximum depth rating. If you pile finishing putty on thickly to fill a deep collision dent (a job meant for heavy structural filler), the massive volume of trapped solvents will eventually escape, causing the material to shrink, sink, and ultimately crack under the stress of vehicle vibration.
Painting directly over any body filler or finishing putty is highly discouraged. Because the putty has a different porosity and chemical makeup than the surrounding clear coat or bare metal, the basecoat solvents will soak into the putty at a different rate. This causes "mapping" or "ringing," where the exact outline of the repair becomes visible through the final clear coat. Always seal the repair with a 2K primer first.
Pinholes in your finishing putty are usually caused by aggressive mixing techniques on the board. Whipping the putty in a circular motion folds air into the resin. To prevent this, use a folding and pressing motion when mixing the hardener. Additionally, failing to use firm pressure during the "tight skim" application can trap air beneath the putty layer, which is then exposed when you block the surface flat.


